SAT Registration Guide: How to Register Without Mistakes
Avoid common errors when registering for the Digital SAT. A complete step-by-step guide to accounts, photo uploads, test centers, and device setup.
Quick Facts
- Legal Identity: Your registered name must match your physical photo ID exactly
- Base Fee: Domestic US registration is $68; late registration is listed at $38 as of the June 23, 2026 College Board fee-page check
- Accommodations: SSD approval takes 7-8 weeks and must be linked via your SSD code
- Device Loan: Requests for a College Board testing device must be submitted 30 days prior
- Photo Upload: A clear, front-facing headshot is mandatory; casual selfies will be rejected
- Admission Ticket: Pre-exam setup in Bluebook must be completed 1-5 days before test day
- No Duplicates: Never create a second College Board account if you forget your login details
Preparing for the SAT involves more than studying quadratic systems, vocabulary in context, and punctuation rules. Many students dedicate months to mastering content only to face administrative obstacles on test day. Logistical and administrative mistakes during registration are among the most common reasons students are turned away from test centers, have their registrations canceled, or experience delays in score reporting.
With the transition of the SAT to a fully digital format using the Bluebook testing application, the registration process is linked directly to your digital profile and device setup. A simple error—such as registering under a nickname that does not match your photo ID, uploading a casual selfie with filters, or missing the deadline to request a College Board loaner laptop—can disrupt your testing plans.
This guide provides a comprehensive, step-by-step roadmap to navigating the Digital SAT registration process. We analyze the common administrative pitfalls, outline strategies for selecting optimal test centers, explain how to manage fee structures and accommodations, and show you how to ensure your device is ready for test day.
Table of Contents
- Phase 1: Pre-Registration Requirements & Identity Matching
- Phase 2: Step-by-Step Online Registration Workflow
- Phase 3: The 10 Most Common Registration Mistakes
- Phase 4: Test Center Selection Strategy
- Phase 5: Test Center Check-In and Security Workflows
- Phase 6: Managing Fees, Fee Waivers, and Cancellations
- Phase 7: Services for Students with Disabilities (SSD) Accommodations
- Phase 8: Device Loan Protocols & Bluebook App Setup
- Phase 9: Bluebook Troubleshooting & Technical Solutions
- Phase 10: Integrating Timelines with Study Planning
- Phase 11: Mini-Practice Test: Sample Math & Verbal Exercises
- Official Sources, Trademark Disclaimer, and Final Notes
1. Phase 1: Pre-Registration Requirements & Identity Matching
Before you open the registration portal, you must gather your personal data, credentials, and documentation. Attempting to locate these details mid-session can lead to session timeouts, which may require you to restart the process.
Creating and Managing Your College Board Student Account
All registrations must be completed through a single, unified College Board student account.
- The Duplicate Account Trap: If you forget your password or username, do not create a new account. Duplicate profiles cause data discrepancies, split score reports, and delays in transmitting scores to colleges. Use the online retrieval tools or call College Board customer support (866-756-7346) to recover your original credentials.
- Email Choice: Register with a personal, long-term email address (e.g., Gmail or Outlook) rather than a school-issued student email address. High school email accounts are frequently deactivated immediately after graduation, which will block you from accessing your official score reports and sending them to colleges.
- Legal Identity Matching: The first and last names you input must match your physical, government-issued photo ID or school student ID card exactly.
+-------------------------------------------------------------+
|               IDENTITY MATCHING PROTOCOL                    |
+------------------------------------+------------------------+
| Name on Photo ID                   | Allowed Registration   |
+------------------------------------+------------------------+
| Jonathan Michael Smith             | Jonathan Michael Smith |
| Jonathan M. Smith                  | Jonathan Smith         |
| Maria-Elena Ramirez                | Maria-Elena Ramirez    |
+------------------------------------+------------------------+
| Name on Photo ID                   | Rejected Registration  |
+------------------------------------+------------------------+
| Jonathan Michael Smith             | Jonny Smith            |
| Maria-Elena Ramirez                | Maria Ramirez          |
| Robert J. Davis Jr.                | Robert Davis           |
+------------------------------------+------------------------+
Hyphenated, Compound, and International Name Formats
In our multicultural educational landscape, student names often deviate from the standard “First, Middle, Last” template.
- Hyphenated and Compound Surnames: If your physical ID displays a hyphenated surname (e.g., Smith-Jones) or a compound surname without a hyphen (e.g., Ramirez Ruiz), you must register with both names. If the registration dashboard lacks sufficient space or returns formatting errors, enter the names without hyphens or spaces, prioritizing the exact sequence of letters.
- Spanish Naming Customs: In many Spanish-speaking countries, individuals hold two surnames (the father’s first surname followed by the mother’s first surname). When registering, both surnames must be placed in the “Last Name” field. Omitting the maternal surname to match school systems will result in a mismatch with your passport.
- East Asian Name Orders: In East Asian countries, the family name is written first (e.g., Kim Min-jee). When registering for the SAT, you must map the names to the Western fields on the College Board portal: place the family name in the “Last Name” field and the given name in the “First Name” field. Do not reverse them.
If your ID lists suffixes (e.g., Jr., III), ensure they are reflected in your registration profile. Test center coordinators must enforce these matching rules, and minor discrepancies can result in your entry being denied.
Valid Photo Identification Standards
On the morning of the exam, you must present a physical, original ID card. Photocopies, digital IDs on mobile phones, or expired identification documents are not accepted. Ensure the document you plan to bring meets the College Board’s criteria:
- Accepted Domestic IDs: State-issued driver’s license or learner’s permit, government-issued passport, current-year school-issued student ID card (must be a physical plastic card), or a state-issued non-driver ID card.
- Accepted International IDs: In most international locations, a valid, physical government-issued passport is the only accepted form of identification. If you are testing outside your home country, verify local ID requirements.
- Unacceptable IDs: Birth certificates, social security cards, library cards, credit cards, or digital school IDs (e.g., Apple Wallet student cards).
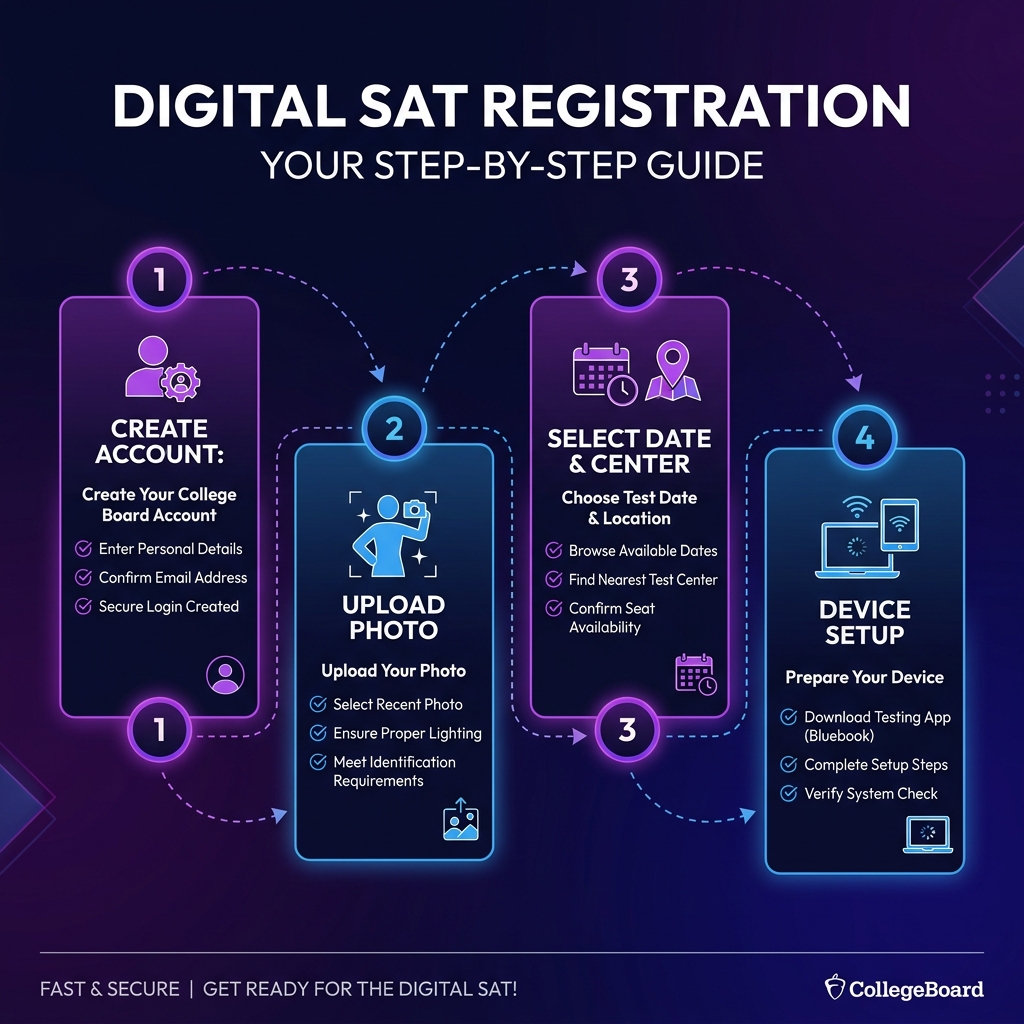
2. Phase 2: Step-by-Step Online Registration Workflow
Once your documents are ready, follow this systematic workflow to complete your booking on the College Board portal:
[Log in to Portal] -> [Select Test Date & Center] -> [Upload Photo] -> [Confirm Accommodations / Device Loan] -> [Submit Payment] -> [Complete Bluebook Setup]Step 1: Log in and Select ‘Register for the SAT’
Navigate to the official College Board Registration Portal, log in to your account, and select the registration option. The system will prompt you to review and confirm your demographic profile, high school affiliation, and parent information.
Step 2: Choose Your Test Date and Test Center
Select your preferred test administration date. The system will display a list of testing centers near your zip code that have available seats.
- If your local high school is full, expand your search radius.
- Pay close attention to the center code and street address to avoid driving to the wrong location on test day.
Step 3: Enter Special Programs and Codes
If you have a fee waiver code provided by your school counselor, enter it in the payment field. If you have approved SSD accommodations, verify that your SSD eligibility code is linked to your registration to ensure the testing software loads the correct accommodation profile.
Step 4: Upload Your Student Photograph
You must upload a digital photograph that will print on your admission ticket. This photo is used by test center staff for identity verification.
Photo Upload Rules:
- The photo must show only you, with your face centered, in focus, and fully visible.
- You must look directly at the camera with eyes open, using a neutral expression or a natural smile.
- The background must be plain and light-colored.
- Do not wear hats, caps, or sunglasses (head coverings worn for religious reasons are permitted, but your face must be visible from the chin to the top of the forehead).
- Do not apply digital filters, borders, or text overlays.
       [VALID PHOTO]                      [INVALID PHOTO]
+--------------------------+        +--------------------------+
|  - Plain background      |        |  - Casual background     |
|  - Full face visible     |        |  - Wearing a baseball cap|
|  - Headshot crop         |        |  - Group shot / cropped  |
|  - Balanced lighting     |        |  - Filter applied        |
+--------------------------+        +--------------------------+
Step 5: Submit Payment and Print Confirmation
Confirm your choices, review the terms and conditions, and submit your payment (or apply your fee waiver). Once processed, the portal will generate a registration confirmation. Note that this confirmation is not your admission ticket; you must complete the pre-exam setup in the Bluebook app to generate your ticket.
3. Phase 3: The 10 Most Common Registration Mistakes
To help you avoid common errors, here is an analysis of the ten most frequent registration mistakes, along with instructions on how to prevent or resolve them.
Mistake 1: Middle Initials, Nicknames, and Hyphen Discrepancies
Students often register using a nickname (e.g., “Jake” instead of “Jacob”) or omit a hyphenated second last name because their school records use a shortened version.
- The Pitfall: The test center coordinator checks the name on your admission ticket against your physical ID. If they do not match exactly, you will be turned away.
- Example: Sarah Jane Watson-Smith registers as “Sarah Watson.” On test day, her passport displays “Sarah Jane Watson-Smith.” The proctor notices the mismatch and denies entry.
- The Resolution Checklist:
- Check the passport or state ID spelling before filling in fields.
- If registered incorrectly, call College Board customer service immediately.
- Ensure the high school database matching does not override your legal name.
Mistake 2: Registering for the Wrong SAT Program (School Day vs. Saturday)
School Day administrations are organized by schools on weekdays, whereas national administrations occur on Saturdays.
- The Pitfall: Students sometimes register for a Saturday exam expecting to take it at their own school during the week, or vice versa, leading to missed test dates.
- Example: A student registers for a Saturday exam assuming it is the same as the free school-wide weekday exam. They fail to show up on Saturday, losing their registration fee.
- The Resolution Checklist:
- Confirm with your counselor whether you are testing on a weekday or Saturday.
- Verify that Saturday bookings indicate the specific center code of the hosting high school.
Mistake 3: Missing the 30-Day Device Loan Window
The Digital SAT requires a compatible computer or tablet. If you do not own a device, the College Board can loan you one.
- The Pitfall: Students often request a device loan too late. The College Board requires at least 30 days’ notice to ship and configure the device at your test center.
- Example: A student logs in to request a device 10 days before the exam, only to find the option disabled.
- The Resolution Checklist:
- Assess device availability 2 months before the exam.
- Request a device loan during the initial registration process.
- Follow up via email to confirm the loan status 2 weeks before the exam.
Mistake 4: Uploading a Casual or Group Selfie
Students sometimes upload casual photos, such as group pictures with friends or selfies with filters.
- The Pitfall: The College Board’s automated photo validation system flags non-compliant images, which can lead to the administrative cancellation of your registration.
- Example: A student uploads a portrait cropped from a party photo. The automated system flags it, and the registration is canceled three days before the test.
- The Resolution Checklist:
- Take the photo in front of a neutral, light-colored background.
- Ensure your face is centered and fully visible.
- Do not apply filters, borders, or text overlays.
Mistake 5: Creating Duplicate Accounts to Bypass Password Issues
If you cannot remember your login credentials, creating a new account may seem like a quick solution.
- The Pitfall: The College Board’s database merges profiles with similar details, which can lock you out of both accounts, split your score history, or delay score delivery.
- Example: A student creates a new account to register for their second attempt. Their scores are split across two profiles, delaying their college applications.
- The Resolution Checklist:
- Use the “Forgot Password” or “Forgot Username” links.
- Call College Board customer support rather than creating a new profile.
- Ensure your counselor does not create a duplicate account on your behalf.
Mistake 6: Forgetting to Link SSD Accommodations
Simply having accommodations approved by your school is not enough; they must be linked to your registration.
- The Pitfall: If you do not enter your SSD code during registration, the Bluebook application will load the standard, unaccommodated version of the test, and test center staff will not be authorized to grant you extra time or breaks.
- Example: A student approved for 50% extended time registers without entering their SSD code. On test day, the app runs the standard timer, and they cannot complete the questions.
- The Resolution Checklist:
- Secure accommodations approval 8 weeks before registering.
- Locate your 7-digit SSD code.
- Enter the code in the accommodations field during registration.
Mistake 7: Choosing a Test Center Too Far Away
High-demand centers fill up quickly, leaving only distant options.
- The Pitfall: Driving several hours on the morning of the exam can increase stress and fatigue, impacting your performance.
- Example: A student waits until the deadline to register and must travel 150 miles on test morning, arriving exhausted.
- The Resolution Checklist:
- Check test center availability 3 months before your preferred date.
- Book your seat early to secure a local testing site.
Mistake 8: Neglecting the Pre-Exam Setup on Bluebook
The Bluebook app requires a pre-exam setup window before test day.
- The Pitfall: Failing to complete this step means you cannot download your admission ticket or confirm your device is ready, which can lead to check-in delays or technology issues.
- Example: A student arrives at the test center without completing setup. They struggle to log in and miss the start of the exam.
- The Resolution Checklist:
- Install the Bluebook app on your testing device.
- Log in and complete the setup 1 to 5 days before the exam.
- Print or save your generated admission ticket.
Mistake 9: Bringing Digital, Expired, or Photocopied IDs
Students often assume a photo of their ID on a smartphone is acceptable.
- The Pitfall: Test centers enforce strict security protocols and will reject digital IDs, photocopies, or expired documents.
- Example: A student brings a photocopy of their passport. The proctor denies entry, and the student misses the exam.
- The Resolution Checklist:
- Place your physical, original, valid ID card in your bag the night before.
- Check the expiration date of your ID card well in advance.
Mistake 10: Inputting an Incorrect High School Code (CEEB Code)
Selecting the wrong high school from the dropdown menu can cause issues.
- The Pitfall: Your score reports may be sent to the wrong school, or your counselor may not be able to access your records.
- Example: A student enters the code for a school with a similar name, causing score reporting issues.
- The Resolution Checklist:
- Confirm your school’s 6-digit CEEB code before registering.
- Double-check the school name and city during profile setup.
4. Test Center Selection Strategy
Selecting the right test center is an important part of your test-day preparation. The environment in which you test can influence your focus and performance.
High-Demand vs. Low-Demand Testing Sites
High schools in metropolitan areas tend to fill up first. If you face limited availability, consider these options:
- Private Schools & Colleges: Private institutions often host test administrations and may have smaller testing rooms with fewer students, which can reduce noise and distractions.
- Suburban or Rural Centers: If you live in a city, look for centers in neighboring towns. These locations often have seats available closer to the deadline and may offer a quieter testing environment.
Room Logistics and Testing Conditions
When comparing locations, consider the following environmental factors:
- Room Sizes: Large auditoriums can have echo issues and distractions as students move or type. Smaller classrooms generally provide a quieter environment.
- Power Access: The Bluebook app requires your device to remain powered during the exam. While test centers strive to provide outlets, some older buildings have limited power sources. Choose modern facilities that are more likely to have accessible outlets at every desk.
- Acoustics & Ambient Noise: Centers near busy roads or active construction zones can be distracting. If you are sensitive to noise, ask peers about their experiences at local testing sites before booking.
5. Test Center Check-In and Security Workflows
Understanding the test-day check-in process can help reduce anxiety and prevent delays on the morning of your exam.
Step 1: Arrival and Line Management
Most test centers open their gates at 7:45 AM and close them at 8:00 AM.
- Arrive early to account for parking and lines.
- As you enter the building, look for signs indicating room assignments, which are often grouped alphabetically by last name or by device type.
Step 2: The Proctor Identification Check
At the classroom door, the proctor will verify your identity.
       [PROCTOR VERIFICATION STEP]
+------------------------------------------+
|  1. Present printed admission ticket     |
|  2. Present physical, original photo ID  |
|  3. Proctor checks name and photo match  |
+------------------------------------------+
The proctor will compare the photo on your ID card with the photo on your admission ticket and your physical appearance. Any discrepancies will be flagged.
Step 3: Device Verification and Check-in Codes
Once your identity is confirmed, the proctor will assign you a seat and instruct you to open the Bluebook app.
- You must connect to the test center’s Wi-Fi network.
- The proctor will write the Start Code on the board. You will enter this code into the app to download the encrypted exam and begin the timed sections.
6. Managing Fees, Fee Waivers, and Cancellations
Standard registration carries a set fee, but there are additional costs, waivers, and cancellation policies to keep in mind.
The 2026 Fee Structure
- Base Saturday Registration Fee: $68 (covers both Reading & Writing and Math sections, and includes score reporting to up to four universities if requested during registration).
- Late Registration Fee: +$34 (applies if you register during the late window, typically 2 weeks after the regular deadline).
- Test Center Change / Date Change Fee: +$29 (applies if you reschedule your test date or change your center location).
- Standby Testing Fee: +$53 (charged if you request standby status; this fee is refunded if you are not seated).
- International Regional Fee: +$43 to +$53 (varies by geographic region; international registrations also carry additional delivery fees).
Fee Waiver Eligibility and Benefits
If you meet income eligibility guidelines, you may qualify for an SAT Fee Waiver.
- Eligibility: You must be enrolled in or eligible for the National School Lunch Program, participate in federal assistance programs (e.g., SNAP, Medicaid), meet USDA income guidelines, or be experiencing homelessness.
- Counselor Role: Your high school counselor is the authorized administrator for fee waivers. They will provide you with a unique 12-digit waiver code.
- Waiver Benefits:
- Two free Saturday SAT registrations.
- Unlimited free score reports sent to colleges.
- Exemption from late registration fees and device loan security deposits.
- Waiver of college application fees at participating institutions.
- Free CSS Profile submissions for financial aid applications.
Rescheduling and Cancellation Policies
If you cannot take the exam on your registered date, you must manage your booking to avoid losing your fees:
- Rescheduling: Instead of canceling, you can check your College Board dashboard for available rescheduling or test-center change options. Verify the current fee page before paying.
- Cancellations: If you cancel your registration, you will receive a partial refund.
- As of the June 23, 2026 College Board fee-page check, cancellation is listed at $34.
- Late cancellation is listed separately and may cost more than regular cancellation.
- Late fees, international surcharges, and phone booking fees are non-refundable.
7. Services for Students with Disabilities (SSD) Accommodations
The College Board provides accommodations for students with documented physical, medical, sensory, cognitive, or psychiatric disabilities.
Accommodation Categories & Bluebook Adaptations
Approved accommodations are integrated directly into the Bluebook testing interface:
- Extended Testing Time: The most common accommodation is 50% extended time (time and a half) or 100% extended time (double time). For 50% extended time, the timing parameters adjust as follows:
- Reading & Writing: Increases from 32 minutes to 48 minutes per module.
- Math: Increases from 35 minutes to 52.5 minutes per module. The timing countdown on the screen is updated automatically, and the application enforces the required break schedules.
- Extra and Extended Breaks: Students may be approved for 14-minute breaks between modules (instead of the standard 10-minute break) or breaks on demand. During these breaks, the Bluebook application pauses and displays a secure pause screen.
- Assistive Screen Readers & Text-to-Speech: For students with visual impairments or learning disabilities, the app supports external screen readers (e.g., JAWS or NVDA) and offers zoom settings.
- Paper Testing Accommodations: In rare cases where a student cannot interact with a digital screen, the College Board can approve a physical, paper-based linear exam. This option must be requested and approved through the SSD office.
8. Device Loan Protocols & Bluebook App Setup
Because the SAT is digital, your testing device is a key part of your test-day preparation. You can use a personal device, a school-issued device, or request a loaner from the College Board.
Device Compatibility Checklist
The Bluebook application runs on the following platforms:
- Laptops (macOS or Windows): Windows laptops must run Windows 10 or 11 (Home, Pro, or Education). Macs must run macOS 11.4 or higher. The device must have at least 250 MB of free storage space.
- iPads: Must run iPadOS 14 or higher.
- School-Owned Chromebooks: Chromebooks must be managed by your school; you cannot use a personal Chromebook to run the exam.
Requesting a College Board Device Loan
If you do not have access to a compatible device, you can request a loaner during registration:
- Timing: The request must be submitted at least 30 days before test day.
- Shipping: The College Board will ship a configured testing device (usually a Chromebook) to your assigned test center.
- Test Day Collection: Arrive at the center 30 minutes early on test day. Present your admission ticket and valid ID to collect your loaner device. You will return the device immediately after the exam.
Completing the Pre-Exam Setup
Between 1 and 5 days before the exam, you must complete the pre-exam setup in the Bluebook app:
- Download Bluebook: Install the app on your testing device from the official site (bluebook.app.collegeboard.org).
- Log In: Sign in using your College Board student credentials.
- Run System Check: The app will verify your battery level, operating system compatibility, and storage space.
- Confirm Details: Verify your personal details, test date, and accommodations.
- Generate Admission Ticket: Once the setup is complete, the app will generate your admission ticket. Print the ticket or save it to your device; you must present it at check-in.
9. Bluebook Troubleshooting & Technical Solutions
Even with careful preparation, you may encounter technical issues on test day. Here are solutions to common technical problems:
Issue 1: The App Fails to Launch or Displays a Black Screen
- The Cause: This often occurs due to background processes, corrupted application data, or out-of-date operating systems.
- The Resolution:
- Restart your device.
- Verify that your device meets the minimum operating system requirements.
- Uninstall and reinstall the Bluebook application.
- Disable background processes (such as antivirus scans or screen capture software).
Issue 2: Wi-Fi Disconnection During the Exam
- The Cause: Test center routers can become overloaded when many devices connect simultaneously.
- The Resolution:
- Do not panic. The Bluebook app is designed to run offline once the exam begins.
- Your progress is saved locally to your device’s hard drive.
- Continue working. The app will prompt you to reconnect to upload your answers once the section is complete.
Issue 3: Battery Drainage or Charging Issues
- The Cause: The testing software runs continuous system checks, which can drain your device’s battery quickly.
- The Resolution:
- Arrive with your device fully charged (at least 80% battery life).
- Bring your charging cable.
- If your desk does not have a power outlet, alert the proctor before the exam begins so they can assist you.
10. Integrating Timelines with Study Planning
To optimize your preparation, link your registration milestones directly to your study calendar.
Recommended Prep and Registration Timeline
- 12 Weeks Before: Create or verify your College Board account. Take an initial diagnostic test to establish your baseline score. Register for your target test date to secure a seat at your preferred local center.
- 8 Weeks Before: Submit SSD accommodations requests if needed. Use a study plan generator to establish a weekly study schedule.
- 4 Weeks Before: Confirm your testing device is compatible. If you need a device loan, submit the request before the 30-day deadline.
- 2 Weeks Before: Review the identification requirements and verify you have a valid, physical photo ID.
- 1 Week Before: Complete the pre-exam setup in the Bluebook app. Print your admission ticket. Keep your study load light, focusing on review and rest.
11. Mini-Practice Test: Sample Math & Verbal Exercises
The following registration scenarios are original SATHELP24x7 checks. Use them to test whether you can make the right administrative decision without confusing independent study advice with official College Board policy.
Reading & Writing Section
Question 1: Craft and Structure (Words in Context)
The academic committee noted that while the researcher’s initial data appeared promising, her conclusions were ultimately ______; because the study lacked a representative sample size, the findings could not be generalized to the broader population.
Which choice completes the passage with the most logical and precise word?
- A) premature
- B) irrefutable
- C) comprehensive
- D) unbiased
Answer & Explanation:
- Answer: A) premature
- Explanation: The passage sets up a contrast using the transition word while and the phrase ultimately [blank]. The first clause states the initial data appeared promising, but the second clause explains that the study lacked a representative sample size, meaning the findings could not be generalized. This suggests the conclusions were drawn too early or without sufficient support.
- A) premature: Means occurring or done before the usual or proper time. This fits the context of drawing conclusions too early. Correct.
- B) irrefutable: Means impossible to deny. A study lacking representative data would not produce irrefutable conclusions. Incorrect.
- C) comprehensive: Means complete or including all elements. A study with insufficient data is not comprehensive. Incorrect.
- D) unbiased: Means showing no prejudice. The sample size issue refers to generalizability, not bias. Incorrect.
Question 2: Expression of Ideas (Transitions)
In the late 19th century, botanist George Washington Carver developed crop rotation methods that helped restore nitrogen levels in depleted southern soils, significantly improving agricultural yields. ______ he published dozens of bulletins detailing how farmers could use sweet potatoes and cowpeas to diversify their crops, helping local farmers improve their self-sufficiency.
Which choice completes the text with the most logical transition?
- A) Alternatively,
- B) Furthermore,
- C) Conversely,
- D) Nevertheless,
Answer & Explanation:
- Answer: B) Furthermore,
- Explanation: The first sentence describes Carver’s development of crop rotation methods. The second sentence describes how he published bulletins to help farmers implement these methods. The second sentence adds related information that supports the first point.
- A) Alternatively: Used to introduce an alternative option. The second sentence is an addition, not an alternative. Incorrect.
- B) Furthermore: Means in addition. This correctly connects the two related agricultural achievements. Correct.
- C) Conversely: Used to introduce a contrasting point. There is no contrast here. Incorrect.
- D) Nevertheless: Means despite this. This does not fit the supporting relationship between the sentences. Incorrect.
Question 3: Standard English Conventions (Punctuation)
To analyze the movements of tectonic plates, geophysicists place GPS receivers along active fault ______ instruments record subtle shifts in position over time, providing data that help researchers model seismic stress accumulation.
Which choice completes the text with the most logical punctuation?
- A) lines, these
- B) lines; these
- C) lines these
- D) lines, because
Answer & Explanation:
- Answer: B) lines; these
- Explanation: The passage contains two independent clauses. The first is: “To analyze the movements of tectonic plates, geophysicists place GPS receivers along active fault lines.” The second is: “these instruments record subtle shifts in position over time…” Connecting two independent clauses requires a coordinating conjunction (with a comma), a semicolon, or a colon.
- A) lines, these: Creates a comma splice by joining two independent clauses with only a comma. Incorrect.
- B) lines; these: A semicolon is the correct punctuation to separate two independent clauses when no coordinating conjunction is present. Correct.
- C) lines these: Creates a run-on sentence by lacking punctuation between the clauses. Incorrect.
- D) lines, because: Uses because, which is logically incorrect as it suggests tectonic plates are analyzed because the instruments record data, rather than the instruments recording data as part of the analysis process. Incorrect.
Math Section
Question 4: Algebra (Systems of Linear Equations)
A student purchased a total of \(15\) notebooks and binders for school. Each notebook costs \($3\), and each binder costs \($5\). If the student spent a total of \($57\), how many binders did they purchase?
Answer & Explanation:
- Answer: 6
- Explanation: Let \(n\) represent the number of notebooks, and \(b\) represent the number of binders. We can construct a system of linear equations based on the problem:
- The total number of items purchased: \[n + b = 15\]
- The total cost of the items: \[3n + 5b = 57\] Multiply the first equation by 3 to prepare for elimination: \[3(n + b) = 3(15) \implies 3n + 3b = 45\] Subtract this from the cost equation to eliminate \(n\): \[(3n + 5b) - (3n + 3b) = 57 - 45\] \[2b = 12\] Divide by 2: \[b = 6\] Substitute \(b = 6\) back into the first equation to find \(n\): \[n + 6 = 15 \implies n = 9\] The student purchased 6 binders.
Question 5: Advanced Math (Quadratic Systems)
A quadratic function is defined by: \[f(x) = x^2 - 10x + 29\] What is the minimum value of the function?
Answer & Explanation:
- Answer: 4
- Explanation: The minimum value of a quadratic function \(f(x) = ax^2 + bx + c\) where \(a > 0\) occurs at its vertex.
- Find the x-coordinate of the vertex using the formula \(x = -\frac{b}{2a}\): \[x = -\frac{-10}{2(1)} = \frac{10}{2} = 5\]
- Evaluate the function at \(x = 5\) to find the minimum value (the y-coordinate of the vertex): \[f(5) = (5)^2 - 10(5) + 29\] \[f(5) = 25 - 50 + 29\] \[f(5) = -25 + 29 = 4\] The minimum value of the function is 4.
Question 6: Geometry and Trigonometry (Circle Equation)
In the coordinate plane, the equation of a circle is represented by: \[x^2 + y^2 - 12x + 6y = 19\] What is the radius of the circle?
Answer & Explanation:
- Answer: 8
- Explanation: The general center-radius equation of a circle is:
\[(x - h)^2 + (y - k)^2 = r^2\]
To find the radius \(r\), we must complete the square for both the \(x\) and \(y\) terms in the given equation:
- Group the terms: \[(x^2 - 12x) + (y^2 + 6y) = 19\]
- Complete the square for the \(x\) terms by adding \((\frac{-12}{2})^2 = 36\) to both sides: \[(x^2 - 12x + 36) + (y^2 + 6y) = 19 + 36\]
- Complete the square for the \(y\) terms by adding \((\frac{6}{2})^2 = 9\) to both sides: \[(x^2 - 12x + 36) + (y^2 + 6y + 9) = 19 + 36 + 9\]
- Factor and simplify the equation: \[(x - 6)^2 + (y + 3)^2 = 64\] Comparing this to the standard equation, we see that \(r^2 = 64\). Taking the square root of both sides yields: \[r = 8\] The radius of the circle is 8.
12. Official Sources, Trademark Disclaimer, and Final Notes
Official Sources Box
[!NOTE] All registration procedures, fees, photo standards, accommodations, and device loan policies outlined in this guide are based on official guidelines from the College Board. For the latest updates regarding registration deadlines, calendar changes, and test center availability, visit the following official resources:
Trademark Disclaimer
SAT® and Bluebook™ are registered trademarks of the College Board, which was not involved in the production of, and does not endorse, this study guide or the resources hosted on SATHELP24x7.com.
Summary Checklist for Test Day Readiness
To help ensure you are ready for test day, review this final checklist before heading to your center:
- Admission Ticket: Printed confirmation from the Bluebook app (completed during pre-exam setup).
- Photo Identification: Physical, original, valid photo ID (no digital copies or photocopies).
- Testing Device: Fully charged laptop, tablet, or school Chromebook (with the Bluebook app installed and updated).
- Power Charger: Device power cable.
- Approved Calculator: If you prefer to use a physical calculator instead of the built-in Desmos calculator, bring a compliant model (with fresh batteries).
- Pens/Pencils: For scratch work (scratch paper is provided at the test center).
Practice Application: SAT Registration Guide: How to Register Without Mistakes
Decision Example
If general prep affects a real testing decision, separate the official fact from the independent study action before acting.
Follow-Up Drill
Write one timed task, one official-source verification task, and one error-log review task based on this page.
Completion Checklist
- I can state the official fact that matters.
- I can name the independent strategy I will try.
- I have one measurable practice task scheduled.
Next Step
Use the related links below to turn this guide into practice or source verification.
Continue practice →College Board Official SAT Registration Guidelines
Frequently Asked Questions
What should I do if my name on my registration does not match my photo ID?
You must contact College Board customer service immediately to correct the name on your registration. Under no circumstances should you attempt to test with a name discrepancy. Test center coordinators are strictly instructed to turn away any student whose admission ticket name does not match their physical photo ID exactly. If your ID says 'Jonathan' and your ticket says 'Jon', you will not be admitted to the testing room.
Can I use a school-issued ID instead of a government-issued ID?
Yes, a current-year school-issued student ID card with a clear photograph is an acceptable form of identification for domestic testing. However, the card must be a physical plastic card; digital IDs on smartphones or paper photocopies are not accepted under any circumstances. If you are testing internationally, some countries require a valid passport, so check country-specific requirements.
How long does it take for SSD accommodations to be approved?
The accommodations approval process through the College Board's Services for Students with Disabilities (SSD) typically takes 7 to 8 weeks. You should work with your school's SSD coordinator to submit the request at the beginning of the school year. Once approved, you will receive an SSD eligibility code that must be linked to your College Board registration profile.
What is the deadline for requesting a testing device loan from the College Board?
You must submit your device loan request at least 30 days before your scheduled test date. If approved, the College Board will ship a Chromebook pre-installed with the Bluebook testing application directly to your assigned test center. You will collect the device when you check in on the morning of the exam and return it immediately afterward.
What are the dimensions and rules for the registration photo upload?
The registration photo must be a clear, front-facing headshot showing your entire face from the shoulders up, with eyes open and a natural expression or natural smile. The photo must be in JPG or PNG format, at least 250 x 300 pixels, and have a file size under 2.5 MB. Selfies, group photos, heavily filtered images, and photos with hats or sunglasses will be rejected, resulting in the cancellation of your registration.
How do I change my test center or reschedule my test date?
You can reschedule your test date or change your testing center by logging into your College Board account, navigating to your registration details, and selecting the available change option. As of the June 23, 2026 College Board fee-page check, changing a test center is listed at $34. All changes must be completed before the registration deadline for the new date, and you should verify the current fee page before paying.
What is the difference between late registration and waitlist testing?
Late registration is a paid registration window after the regular deadline for eligible administrations, and College Board lists the late fee at $38 as of the June 23, 2026 fee-page check. Waitlist testing, when available, is not a substitute for registering on time and should be verified inside your College Board account for that specific test date and center.
Can I get a refund if I cancel my SAT registration?
Yes, but you may receive only a partial refund. As of the June 23, 2026 College Board fee-page check, cancellation is listed at $34 and late cancellation is listed at $44. Any late registration, service, or international fees may be handled differently, so verify the current fee page before canceling.
Do the pretest or experimental questions affect my scoring output?
No. Each module of the Reading & Writing and Math sections contains exactly 2 pretest questions that do not count toward your raw or scaled scores. These items are distributed randomly to gather difficulty and discrimination parameters for future exams. Because they are indistinguishable from active questions, you must treat every question with the same level of focus.
What happens if I forget my College Board password and create a new account?
Creating a duplicate account is a severe mistake. It can lead to your scores being split across different profiles, delays in score reporting, and complications when sending scores to colleges. If you lose your login credentials, use the account recovery tools on the website or call College Board customer support to restore access to your original account.